Scale and areas – but with a plan | Primary School
In this practical unit, we want to look at how we can use simple digital tools at primary school level. The tool of choice will be a digital pedometer. With the help of this pedometer, pupils will measure the distance between school and home.
Thinking ahead, the teacher must consider issues such as scale and comparability of the individual maps that the children will make themselves.
The children’s individual cards are also sketched on several layers – as in the professional field – and then placed on top of each other. It will be important to find a reference point (near the school) so that the individual layers can be stacked correctly.
As a first step in this practical task, let’s look at the best way to get a pedometer for the children.
A good starting point is here:
https://microbit.org/projects/make-it-code-it/
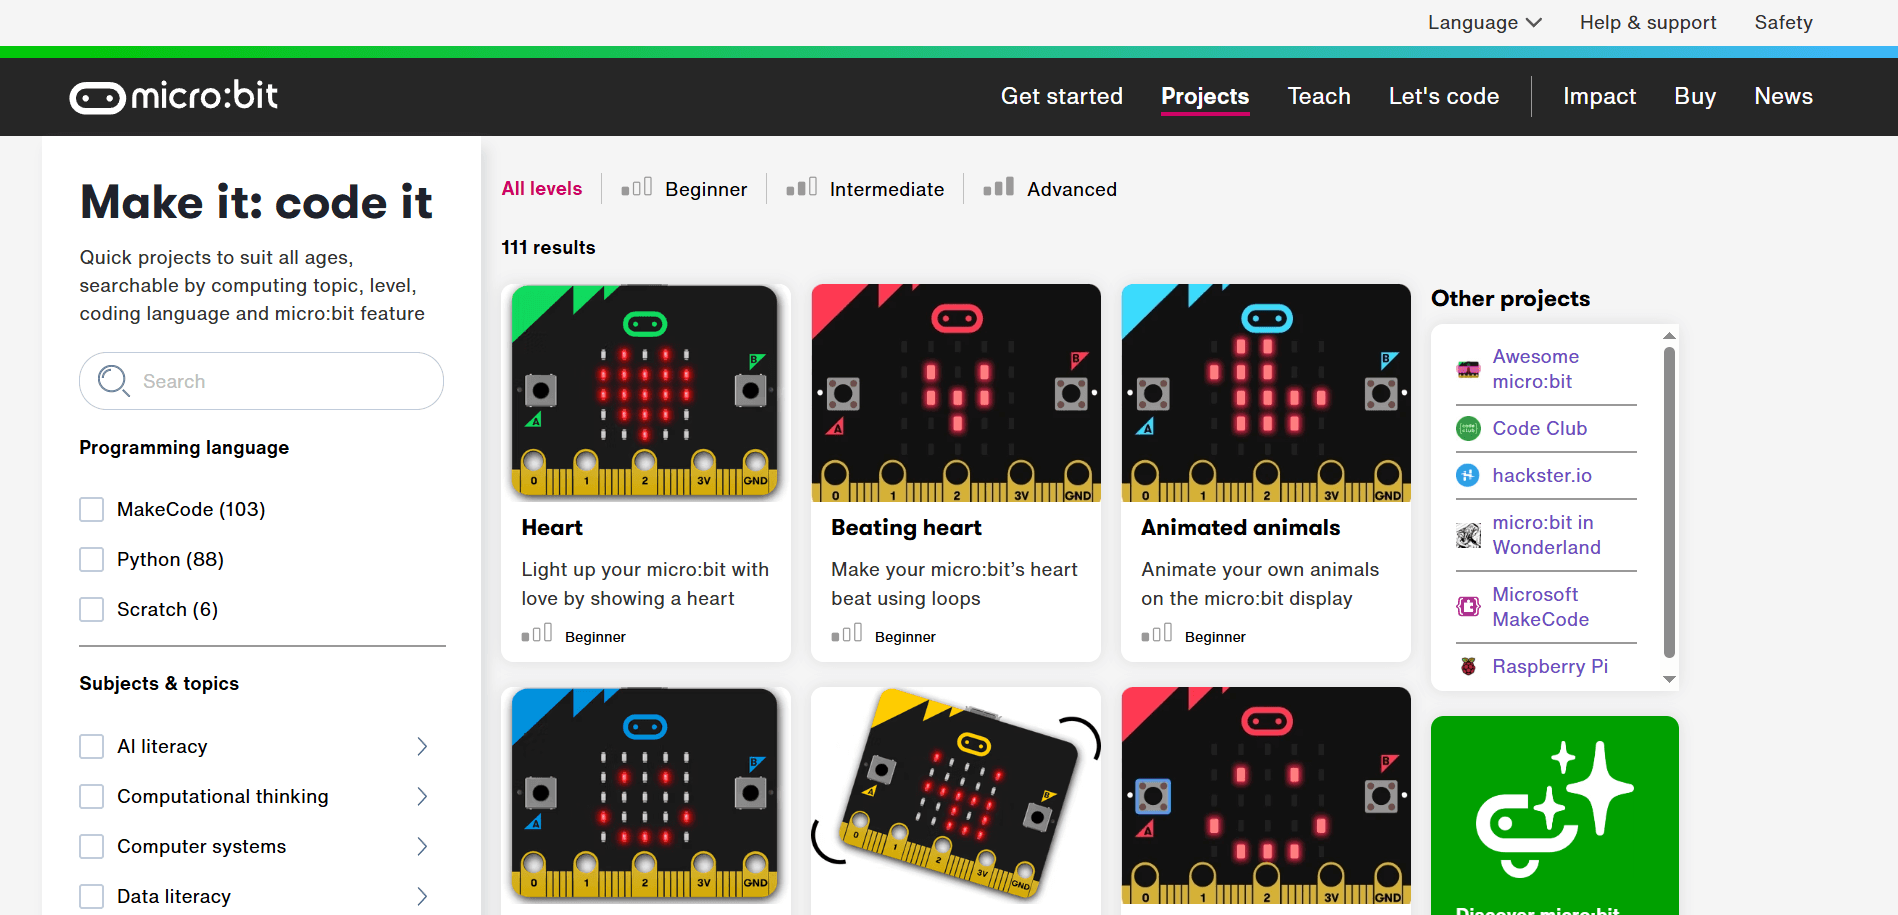
Here you can also find a project for a pedometer (“Step counter”):
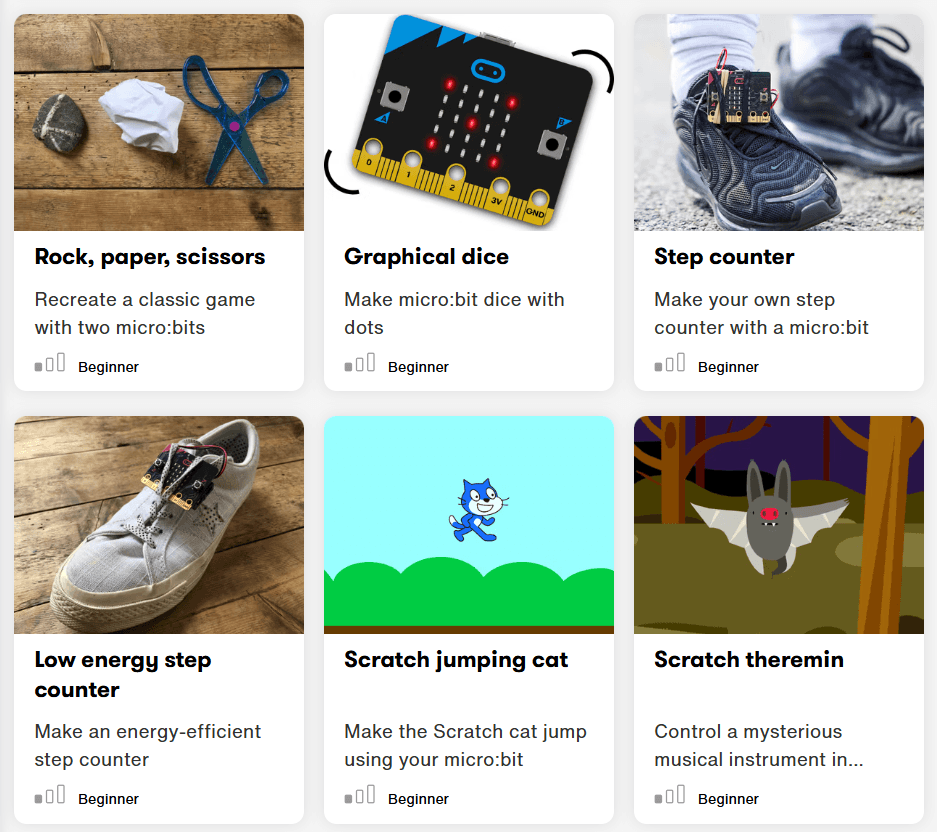
With the help of videos and simple instructions, this pedometer can also be recreated with children.
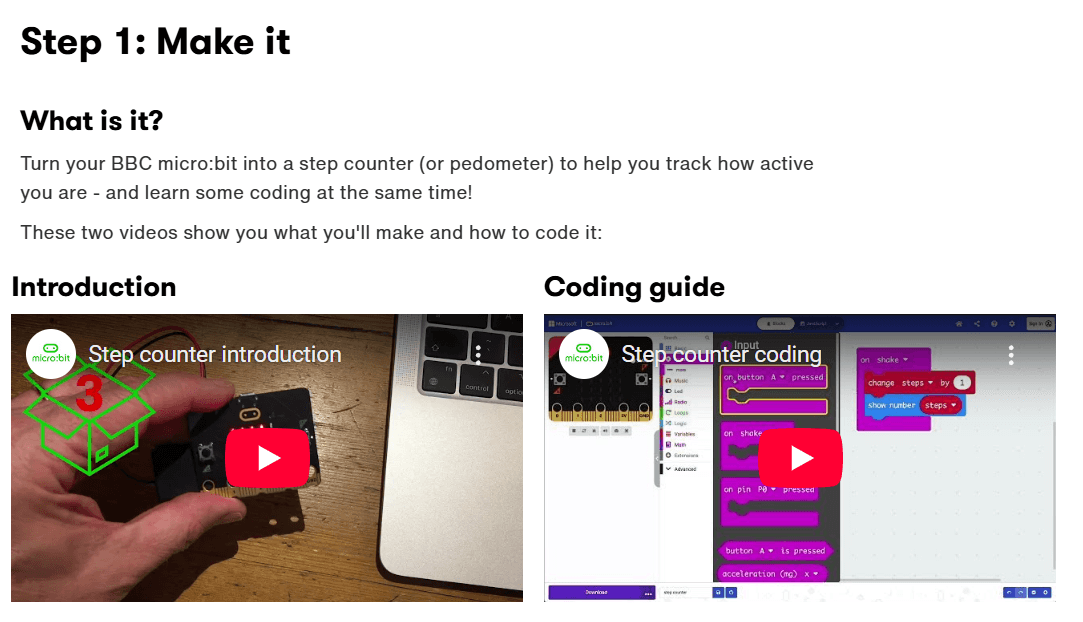
Even the programming is very simple. Similar to LEGO bricks, the individual instructions are presented as easy-to-understand blocks.
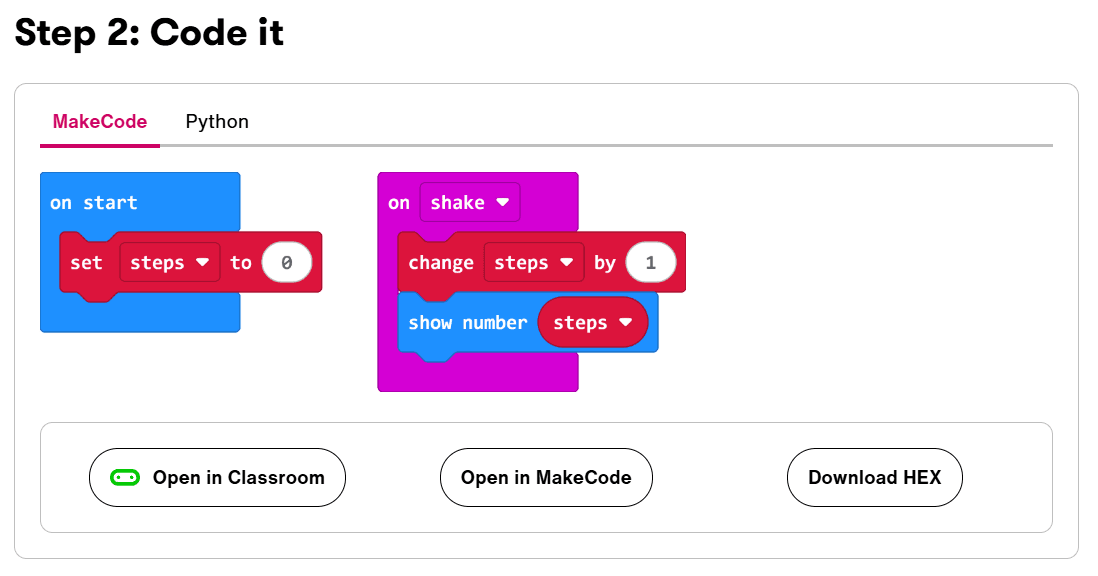
The teacher should carry out the steps themselves beforehand so that they know what possible difficulties are to be expected when building the pedometer. Alternatively, the teacher could prepare the pedometers for the children themselves with little time expenditure and simply hand these fully programmed pedometers over to the children for the project.
The first unit would then deal with the topic of ‘data acquisition’:
The prepared pedometer is then used and the children walk a certain number of steps with this pedometer attached to their shoe. Let’s say, for example, that all children in a class walk 10 steps in the schoolyard. The distance covered is then measured in metres for each individual child.
If we summarise this data in a table, it might look like this:
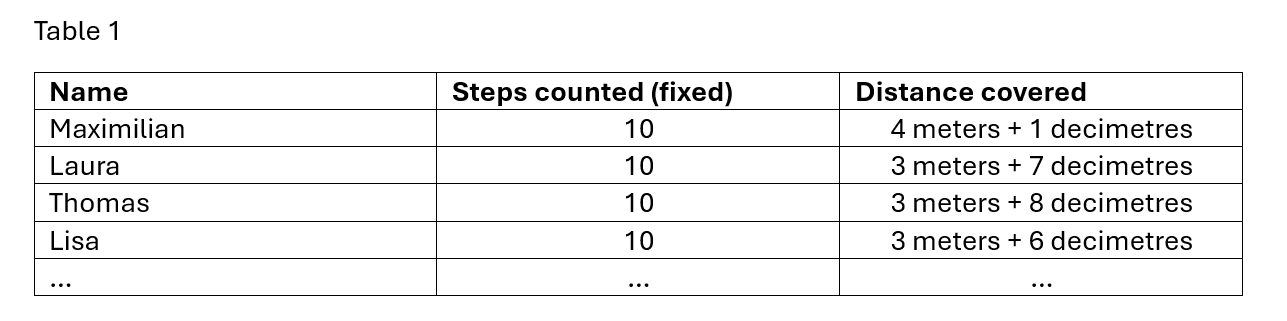
One could then talk to the children about the topic of ‘mean value’.
The idea here could be that you add up all the individual distances and then divide them by the number of steps required. The number of steps required is calculated by multiplying the number of children by ten (as each child has covered ten steps). For example, the distance covered by all the children in a class could be 60 metres and 146 decimetres. This makes a total of 74 metres and 6 decimetres. If we have twenty children in our class, then these children together took 20 times 10 steps = 200 steps.
The following calculation summarises the didactically sensible solution:
746 decimetres divided into 200
If a further division no longer appears possible, we change the size unit and continue the division task happily.
1460 centimetres divided into 200
600 millimetres divided into 200
If the whole division went well, we should get 3 decimetres and 7 centimetres and 3 millimetres for our average stride length in our example.
We can show the children that there are several ways to determine a sensible solution.
It would be just as conceivable to fix the distance and then count the steps required for each individual child. If fractions have already been dealt with, then half steps and possibly quarter steps can also be included.
The resulting table would then look different:
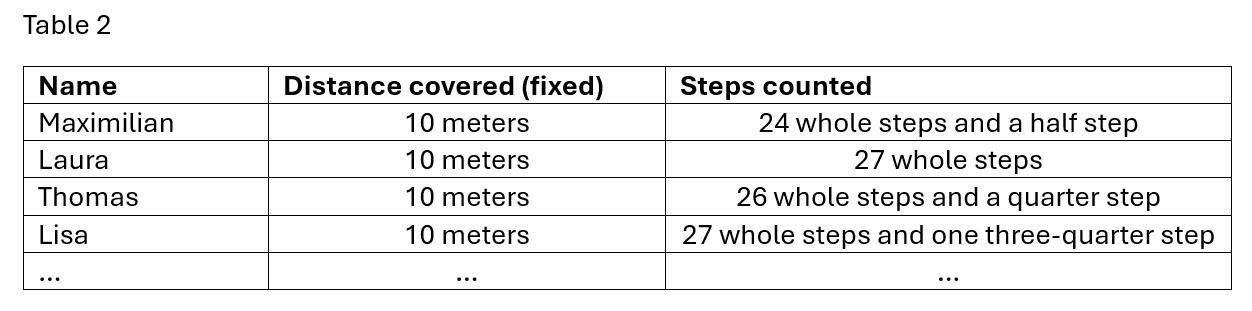
This time we have to add up the steps of all the children. All twenty children have then – for example – covered 536 steps.
Again, the following calculation summarises the didactically sensible solution:
200 meters divided into 536 steps.
That is 2000 decimetres divided into 536 steps.
If a further division no longer appears possible, we change the size unit and continue the division task happily.
If a further division no longer appears possible, we change the size unit and continue the division task happily.
392 decimetres = 3920 centimetres divided into 536 steps
168 centimetres = 1680 millimetres divided into 536 steps
If the whole division went well, we should get 3 decimetres and 7 centimetres and 3 millimetres for our average stride length in our example.
The second unit would then deal with the topic of ‘reference system’:
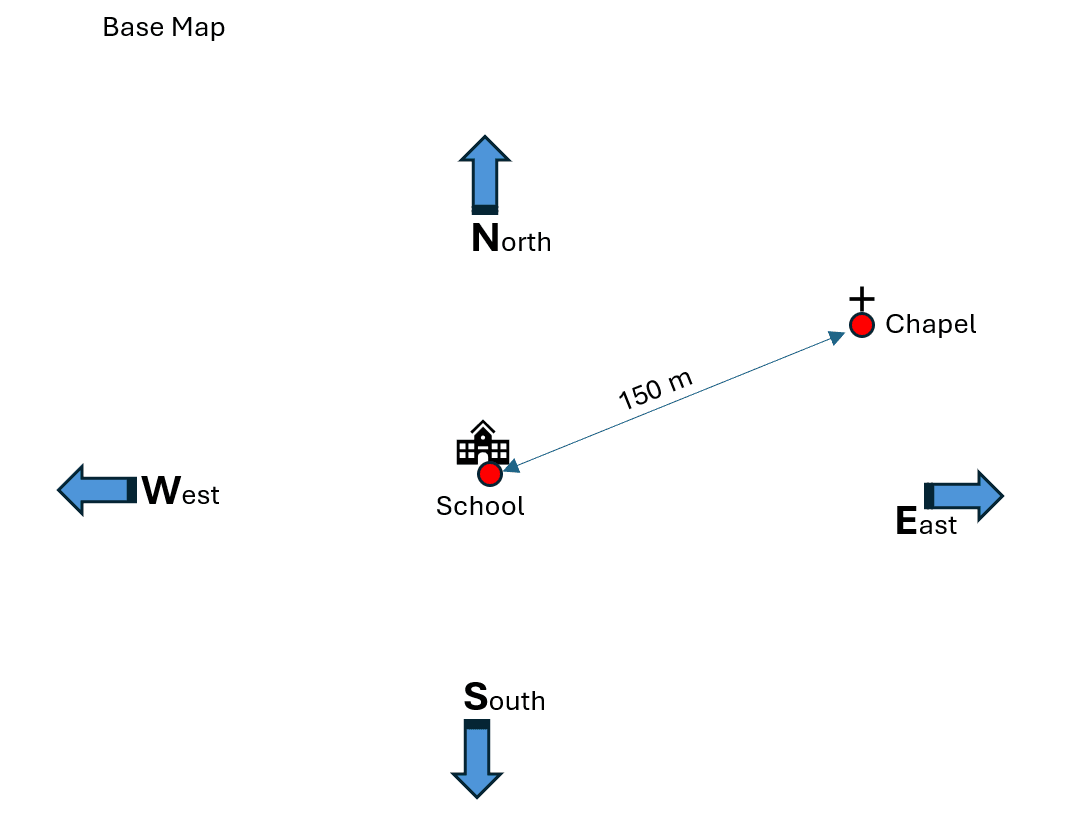
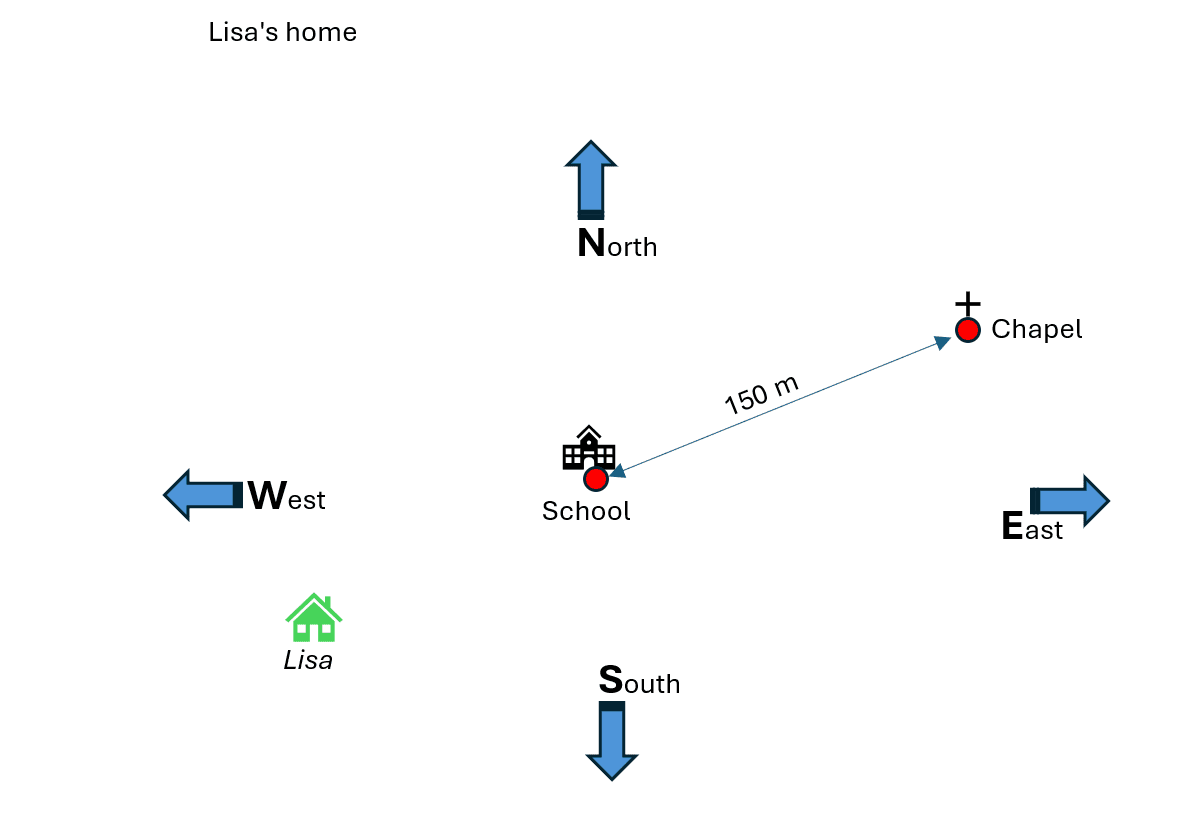
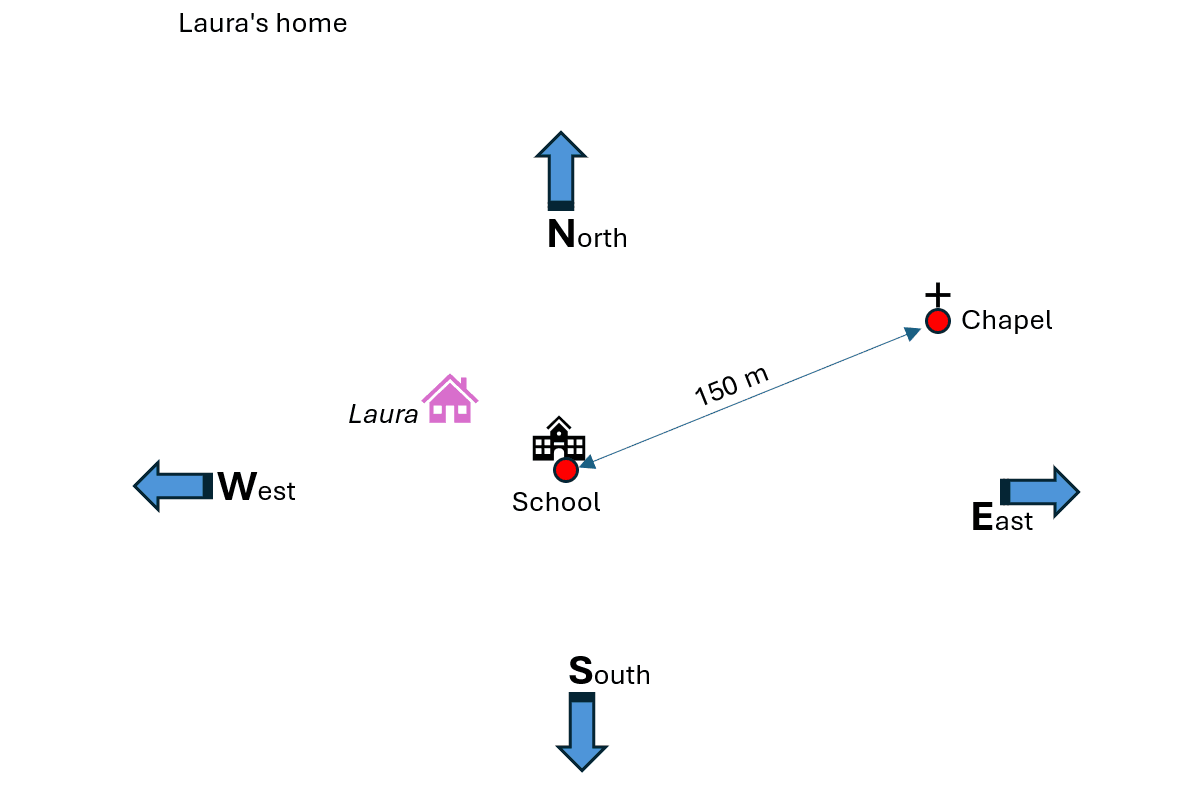
To do this, find a building close to the school location and use the pedometer to measure the distance between this building and the school location. The school building (reference point) and the neighbouring building are now drawn on a base map. The distance between the buildings is also marked using a suitable scale. For orientation purposes, the compass directions are also drawn on this first base map.
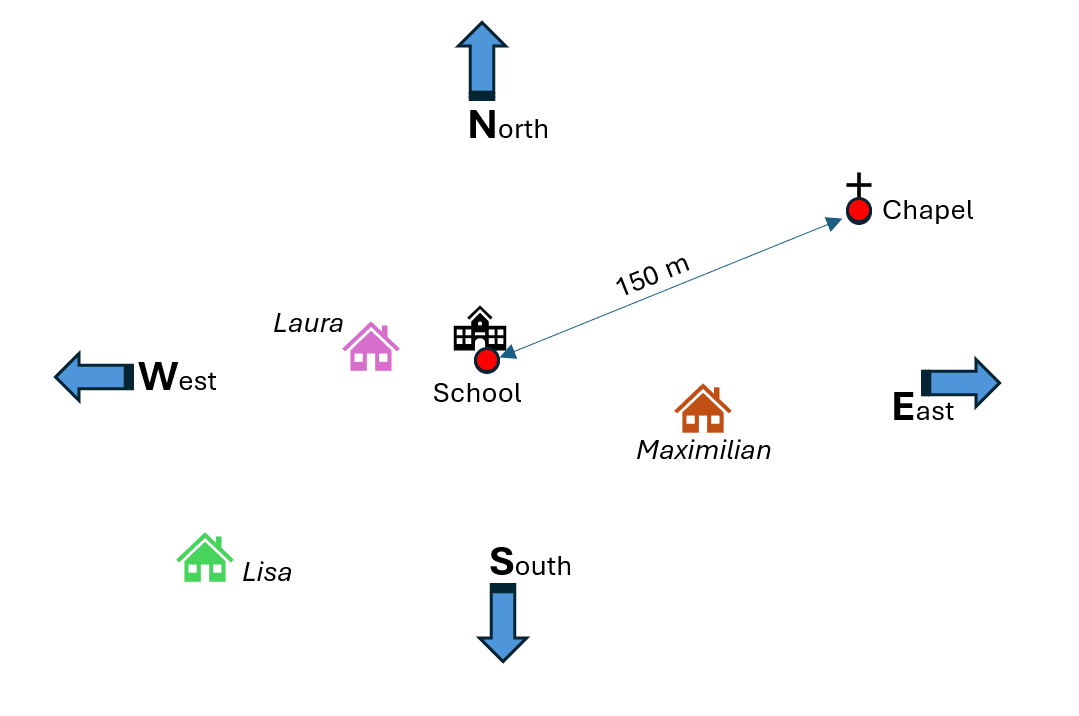
The third unit would then deal with the topic of ‘stacking individual map layers on top of each other’:
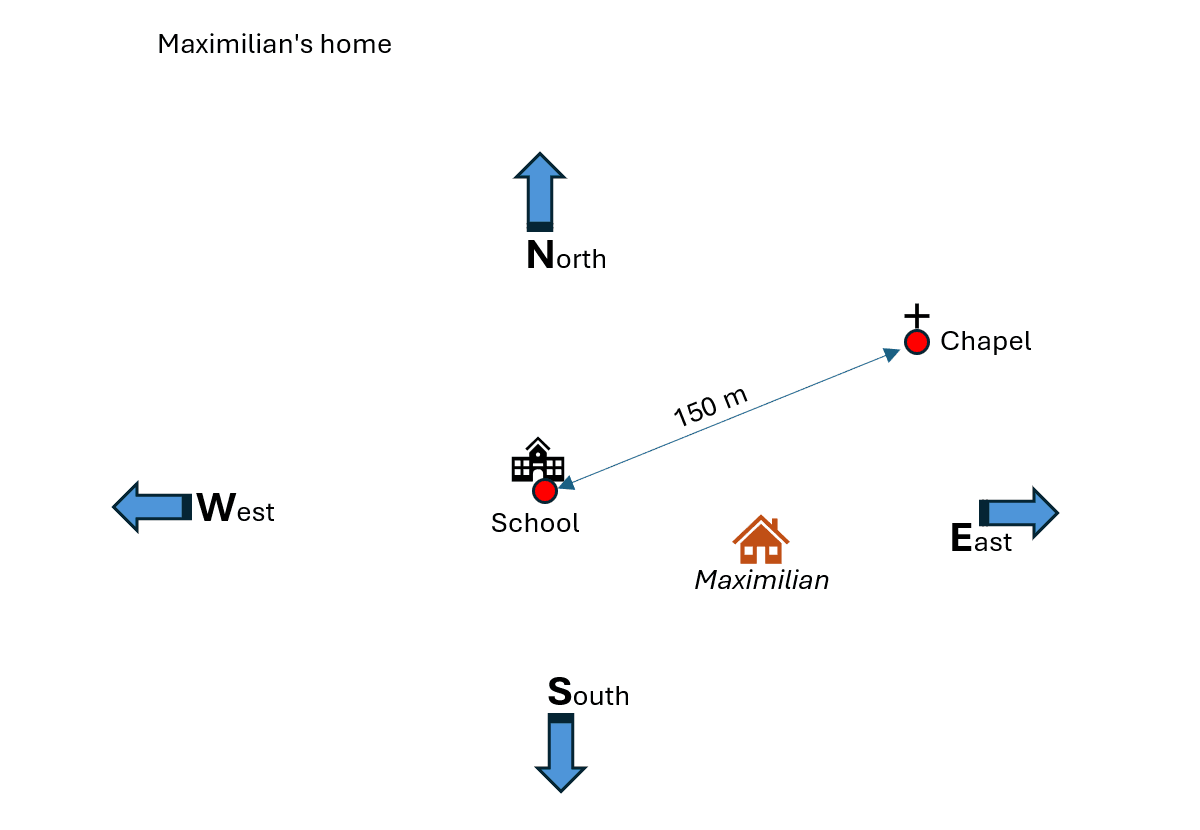
In this unit, each student will now draw their home on the base map. The necessary means of orientation are already available on the base map. A class discussion may be held at this point in order to decide on a suitable scale.
If you lay all the layers on top of each other (for example using several sheets of tracing paper), you get a personalised city map for the class in which the homes of the individual pupils are marked.
2 Comments
Submit a Comment
You must be logged in to post a comment.
Der Einsatz des digitalen Schrittzählers ermöglicht den SchülerInnen, auf anschauliche Weise Entfernungen zu messen und mathematisch zu bearbeiten, was das Verständnis fördert. Besonders positiv ist die Verknüpfung von Technologie mit Mathematik.
Allerdings könnte die Komplexität der mathematischen Berechnungen für Grundschüler herausfordernd sein, insbesondere bei der Umrechnung von Maßeinheiten und Divisionen. Zudem wäre eine tiefere theoretische Erklärung des Maßstabs hilfreich. Auch der technische Aufwand für die Vorbereitung und der mögliche Mangel an Geräten könnten den Unterricht erschweren.
Ich denke den Schüler:innen würde es sehr viel Spaß machen, einen eigenen Schrittzähler zu bauen. Selbst müsste ich mir das Programmieren zuerst aber erst aneignen und herausfinden, wo kann ich einen microbit kaufen, kann ich das auf jeden Laptop programmieren, habe ich den passenden Anschluss und das richtige Kabel,…
Mir gefällt die Idee mit den Schrittzählern gut und ich kann mir vorstellen, dies in meinen zukünftigen Mathe- und Sachunterricht einzubauen. Ebenfalls gelungen ist es, dass der Microbit auch als Kompass verwendet werden kann. Zum Schluss möchte ich noch, sagen, dass die Motivation der Kinder sicher groß ist, da es einen persönlichen Bezug für sie hat und sie viel selber machen dürfen.